
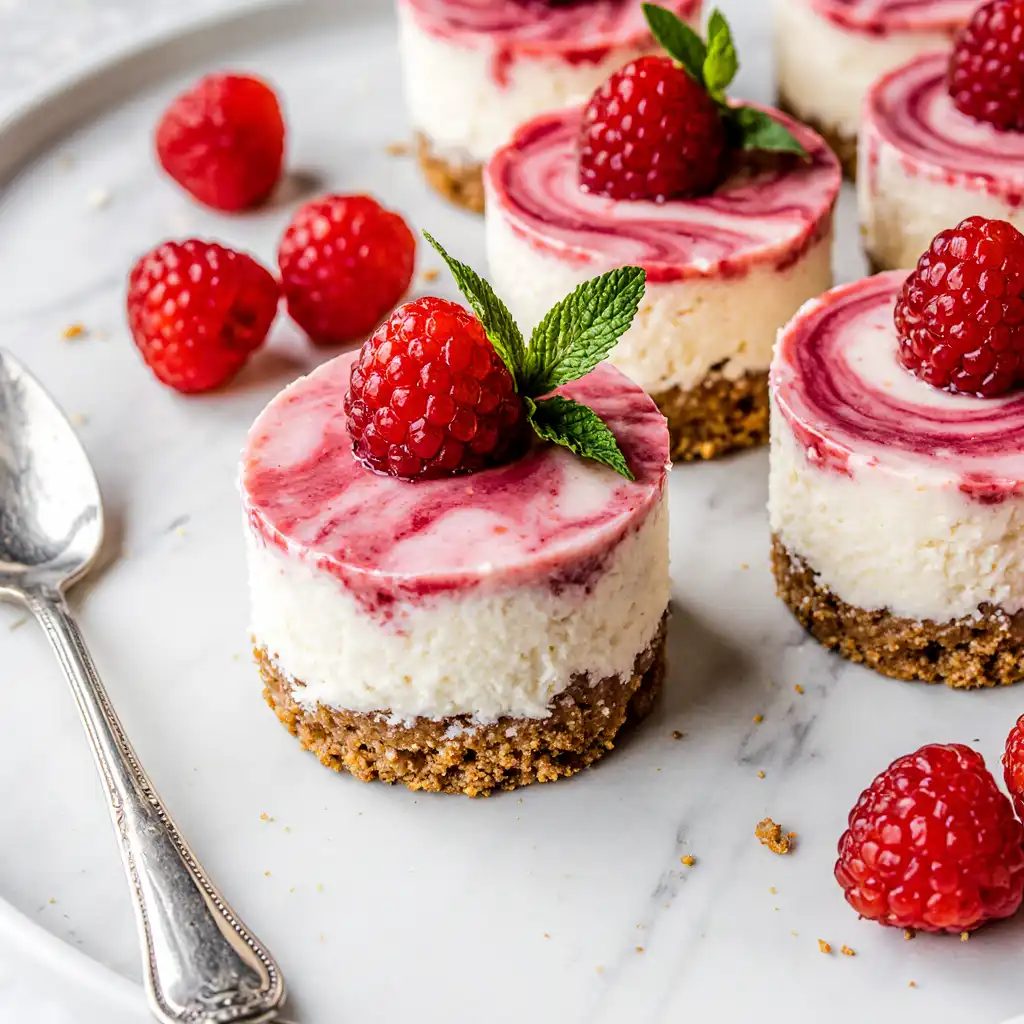
When the temperature rises, the last thing you want to do is turn on the oven. Enter the No-Bake Raspberry Mini Cheesecakes—a sophisticated, bite-sized dessert that combines a buttery graham cracker crust with a silky-smooth cream cheese filling and a burst of tart raspberry. These mini treats are elegant enough for a dinner party but easy enough for a casual weekend snack. By skipping the baking and focusing on fresh ingredients, you get a dessert that is light, airy, and perfectly balanced between sweet and tangy.
Why This Recipe Works
- No Oven Required: Perfect for hot summer days or when your oven is occupied with other dishes.
- Individual Portions: These pre-portioned treats are ideal for hosting, ensuring every guest gets a beautiful, mess-free dessert.
- Vibrant Raspberry Flavor: Using a fresh raspberry swirl or topping provides a natural acidity that cuts through the richness of the cream cheese.
- Velvety Texture: Without eggs or baking, the filling remains incredibly light and mousse-like, melting in your mouth with every bite.
Recipe Details
- Prep Time: 25 Minutes
- Chilling Time: 4 Hours (or overnight)
- Total Time: 4 Hours 25 Minutes
- Yield: 12 Mini Cheesecakes
- Difficulty: Easy
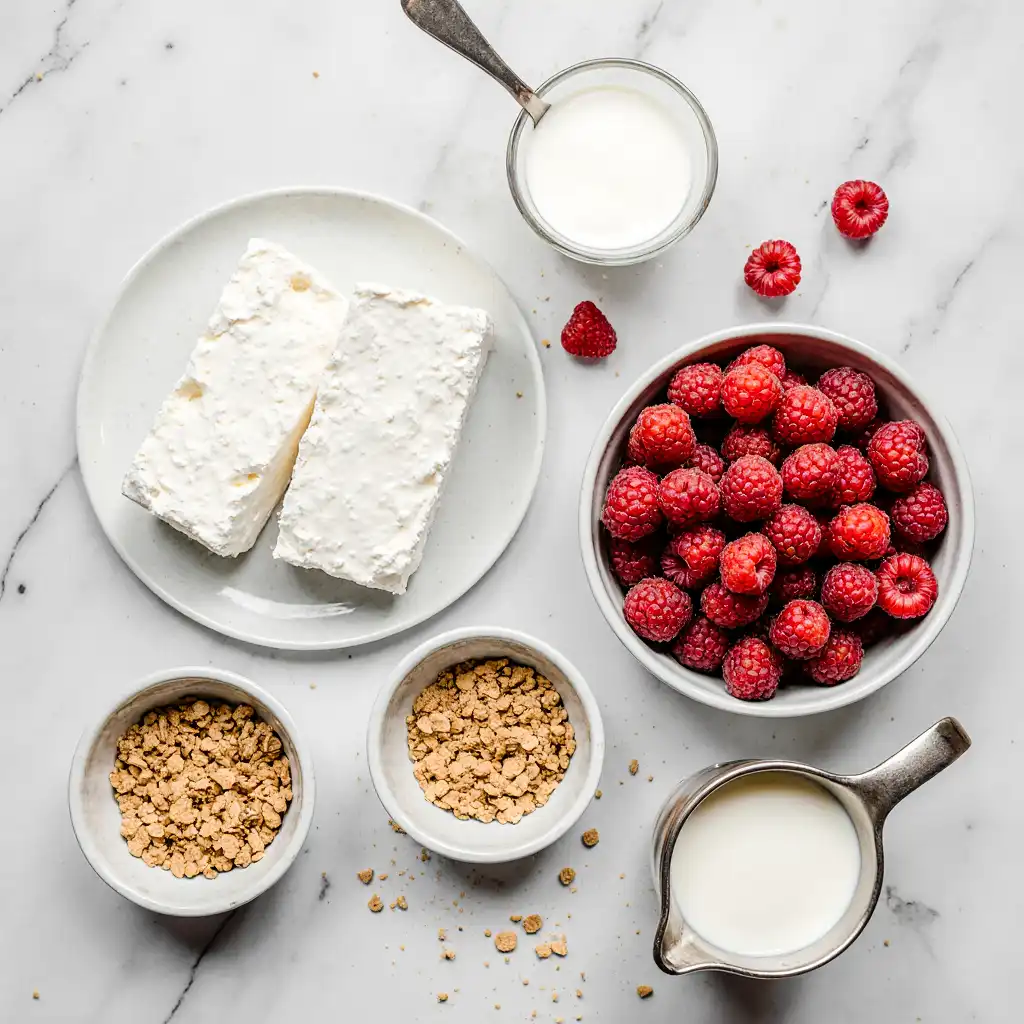
Ingredients
- For the Crust:
- 1 1/2 cups Graham Cracker Crumbs
- 1/4 cup Granulated Sugar
- 6 Tbsp Unsalted Butter, melted
- For the Filling:
- 16 oz (2 blocks) Cream Cheese, softened to room temperature
- 1/2 cup Powdered Sugar
- 1 tsp Vanilla Extract
- 1 tsp Lemon Juice
- 1 cup Heavy Whipping Cream, cold
- For the Raspberry Swirl:
- 1 cup Fresh Raspberries
- 1 Tbsp Powdered Sugar
Instructions
- Prepare the Crust: In a medium bowl, combine graham cracker crumbs, sugar, and melted butter. Press about 2 tablespoons of the mixture into the bottom of a lined 12-cup muffin tin. Use the back of a spoon to pack it down firmly. Chill in the freezer while you make the filling.
- Make the Raspberry Sauce: Blend 1 cup of raspberries with 1 tablespoon of powdered sugar. Strain through a fine-mesh sieve to remove the seeds. Set aside.
- Whip the Cream: In a chilled bowl, beat the heavy cream until stiff peaks form. Set aside.
- Beat the Base: In a large bowl, beat the softened cream cheese, powdered sugar, vanilla, and lemon juice until completely smooth and lump-free.
- Fold: Gently fold the whipped cream into the cream cheese mixture using a spatula until well combined.
- Assemble: Divide the cheesecake filling evenly among the muffin cups.
- The Swirl: Drop 2-3 small dots of raspberry sauce on top of each cheesecake. Use a toothpick to gently swirl the sauce into the filling for a decorative effect.
- Chill: Refrigerate for at least 4 hours (overnight is best) to allow the cheesecakes to set firmly.
- Serve: Carefully remove from the muffin tin. Garnish with a fresh raspberry and a mint leaf before serving.

Conclusion
These No-Bake Raspberry Mini Cheesecakes are the epitome of effortless elegance. They offer all the decadence of a traditional cheesecake with a fraction of the work and none of the heat. The contrast between the crunchy base, the creamy center, and the tart raspberry swirl makes each bite a celebration of summer flavors. Whether you’re a novice baker or a seasoned pro, these mini delights are a foolproof way to impress your guests and satisfy your sweet tooth!
(FAQ)
Q: Can I use frozen raspberries?
A: Yes! Just thaw them first and drain any excess liquid before blending into the sauce.
Q: How do I get them out of the muffin tin easily?
A: Using paper liners is the easiest way. If you prefer no liners, use a silicone muffin mold or ensure the cheesecakes are very cold/frozen before gently popping them out with a knife.
Q: Can I freeze these for later?
A: Absolutely! These mini cheesecakes freeze beautifully. Store them in an airtight container for up to 2 months. Thaw in the fridge for 30 minutes before serving for the best texture.